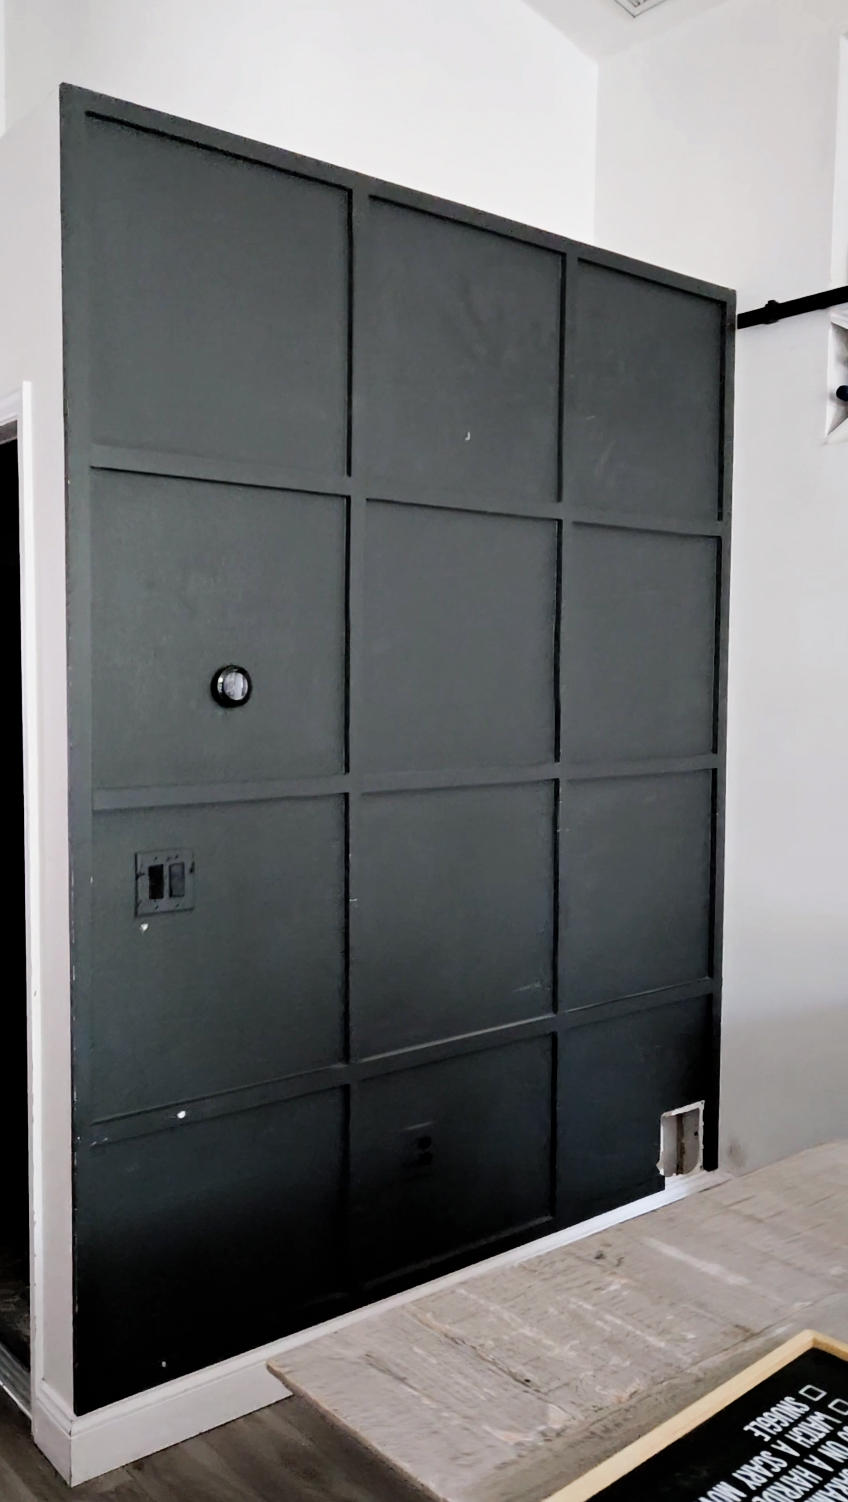
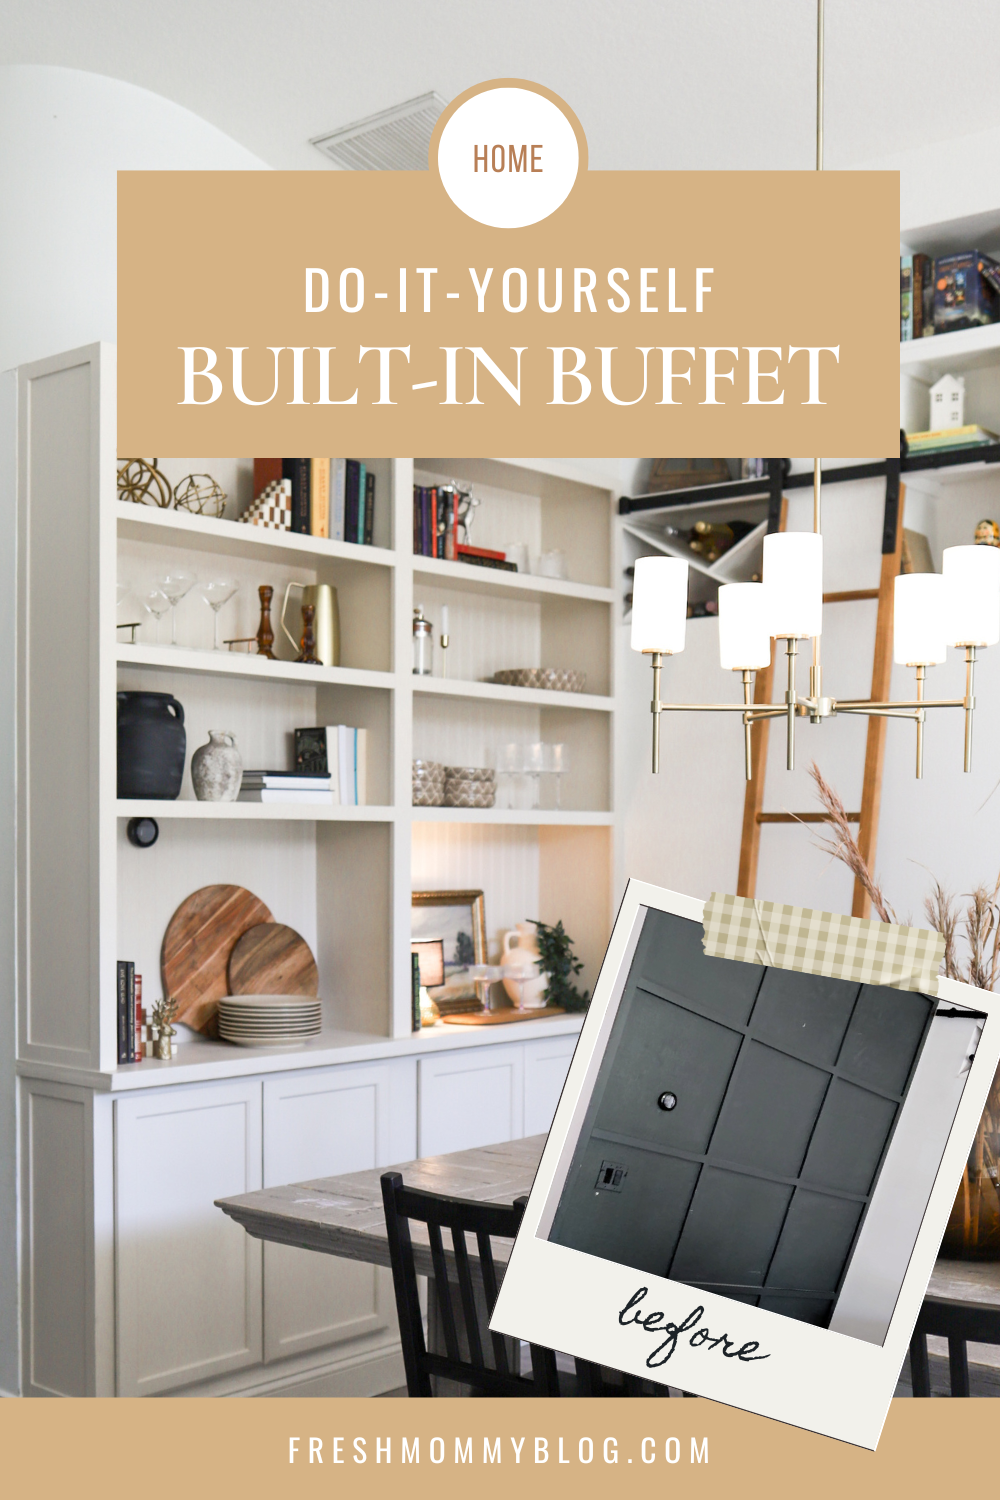
Okay, friends. You know how sometimes a space just stops working for you? That was us with our dining room wall. A few years back, we transformed it with a board and batten grid wall that I absolutely loved, the texture, the character, the moody dark paint. It was a statement wall in the best possible way.
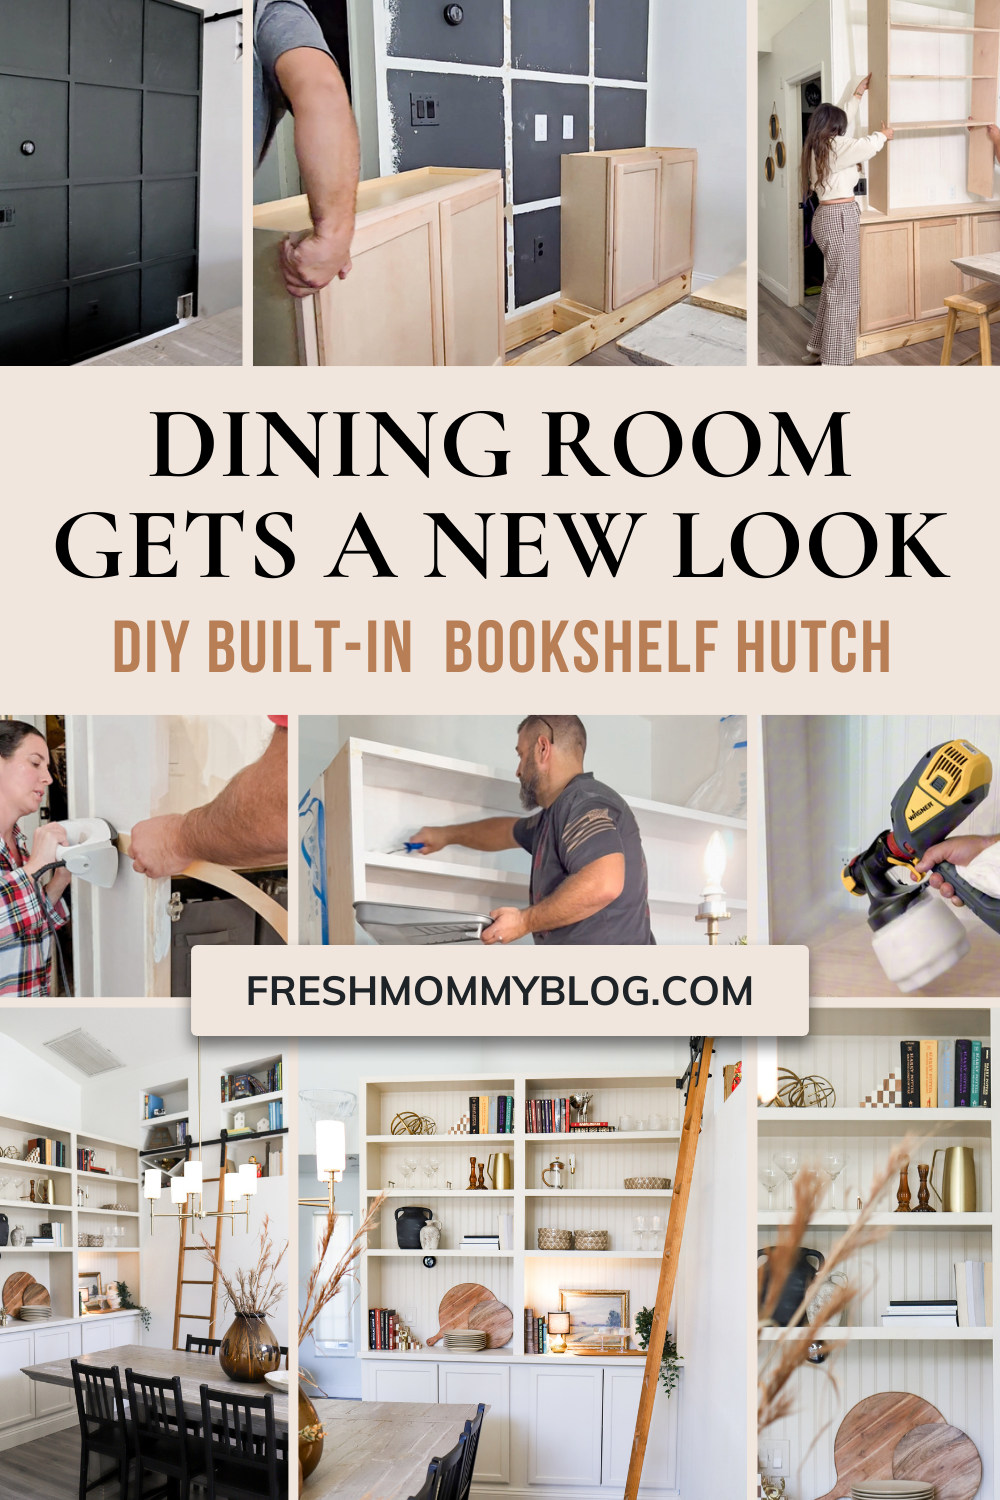
But life changes, and so do our needs. With a family of six, we were running out of storage, I was craving a proper buffet space for hosting, and I kept dreaming about open bookshelves I could style for every season. So we did what we do best around here: we rolled up our sleeves, leaned on some past projects for inspiration, and built something completely new.
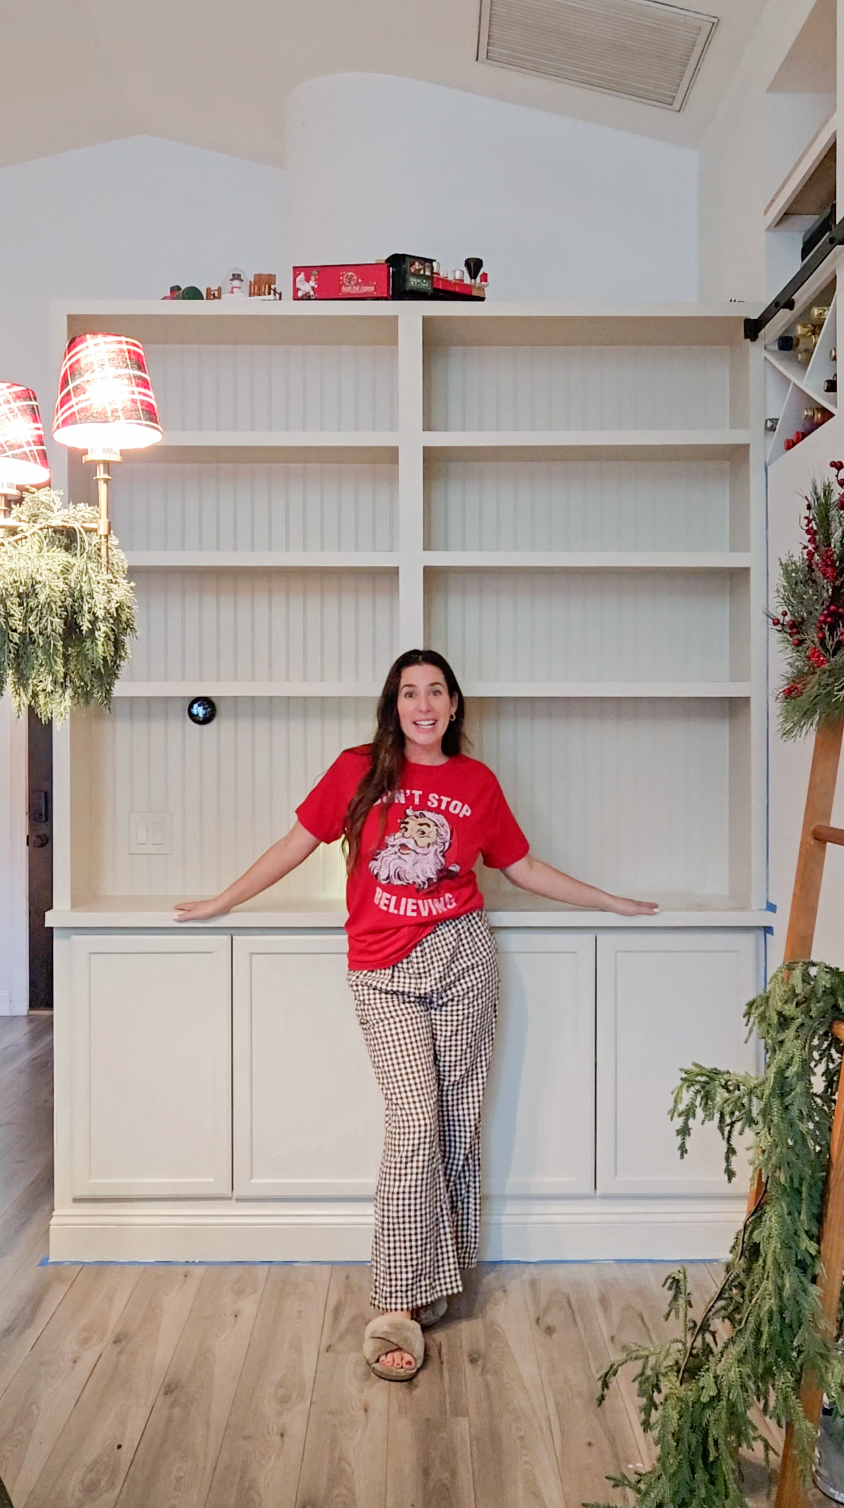
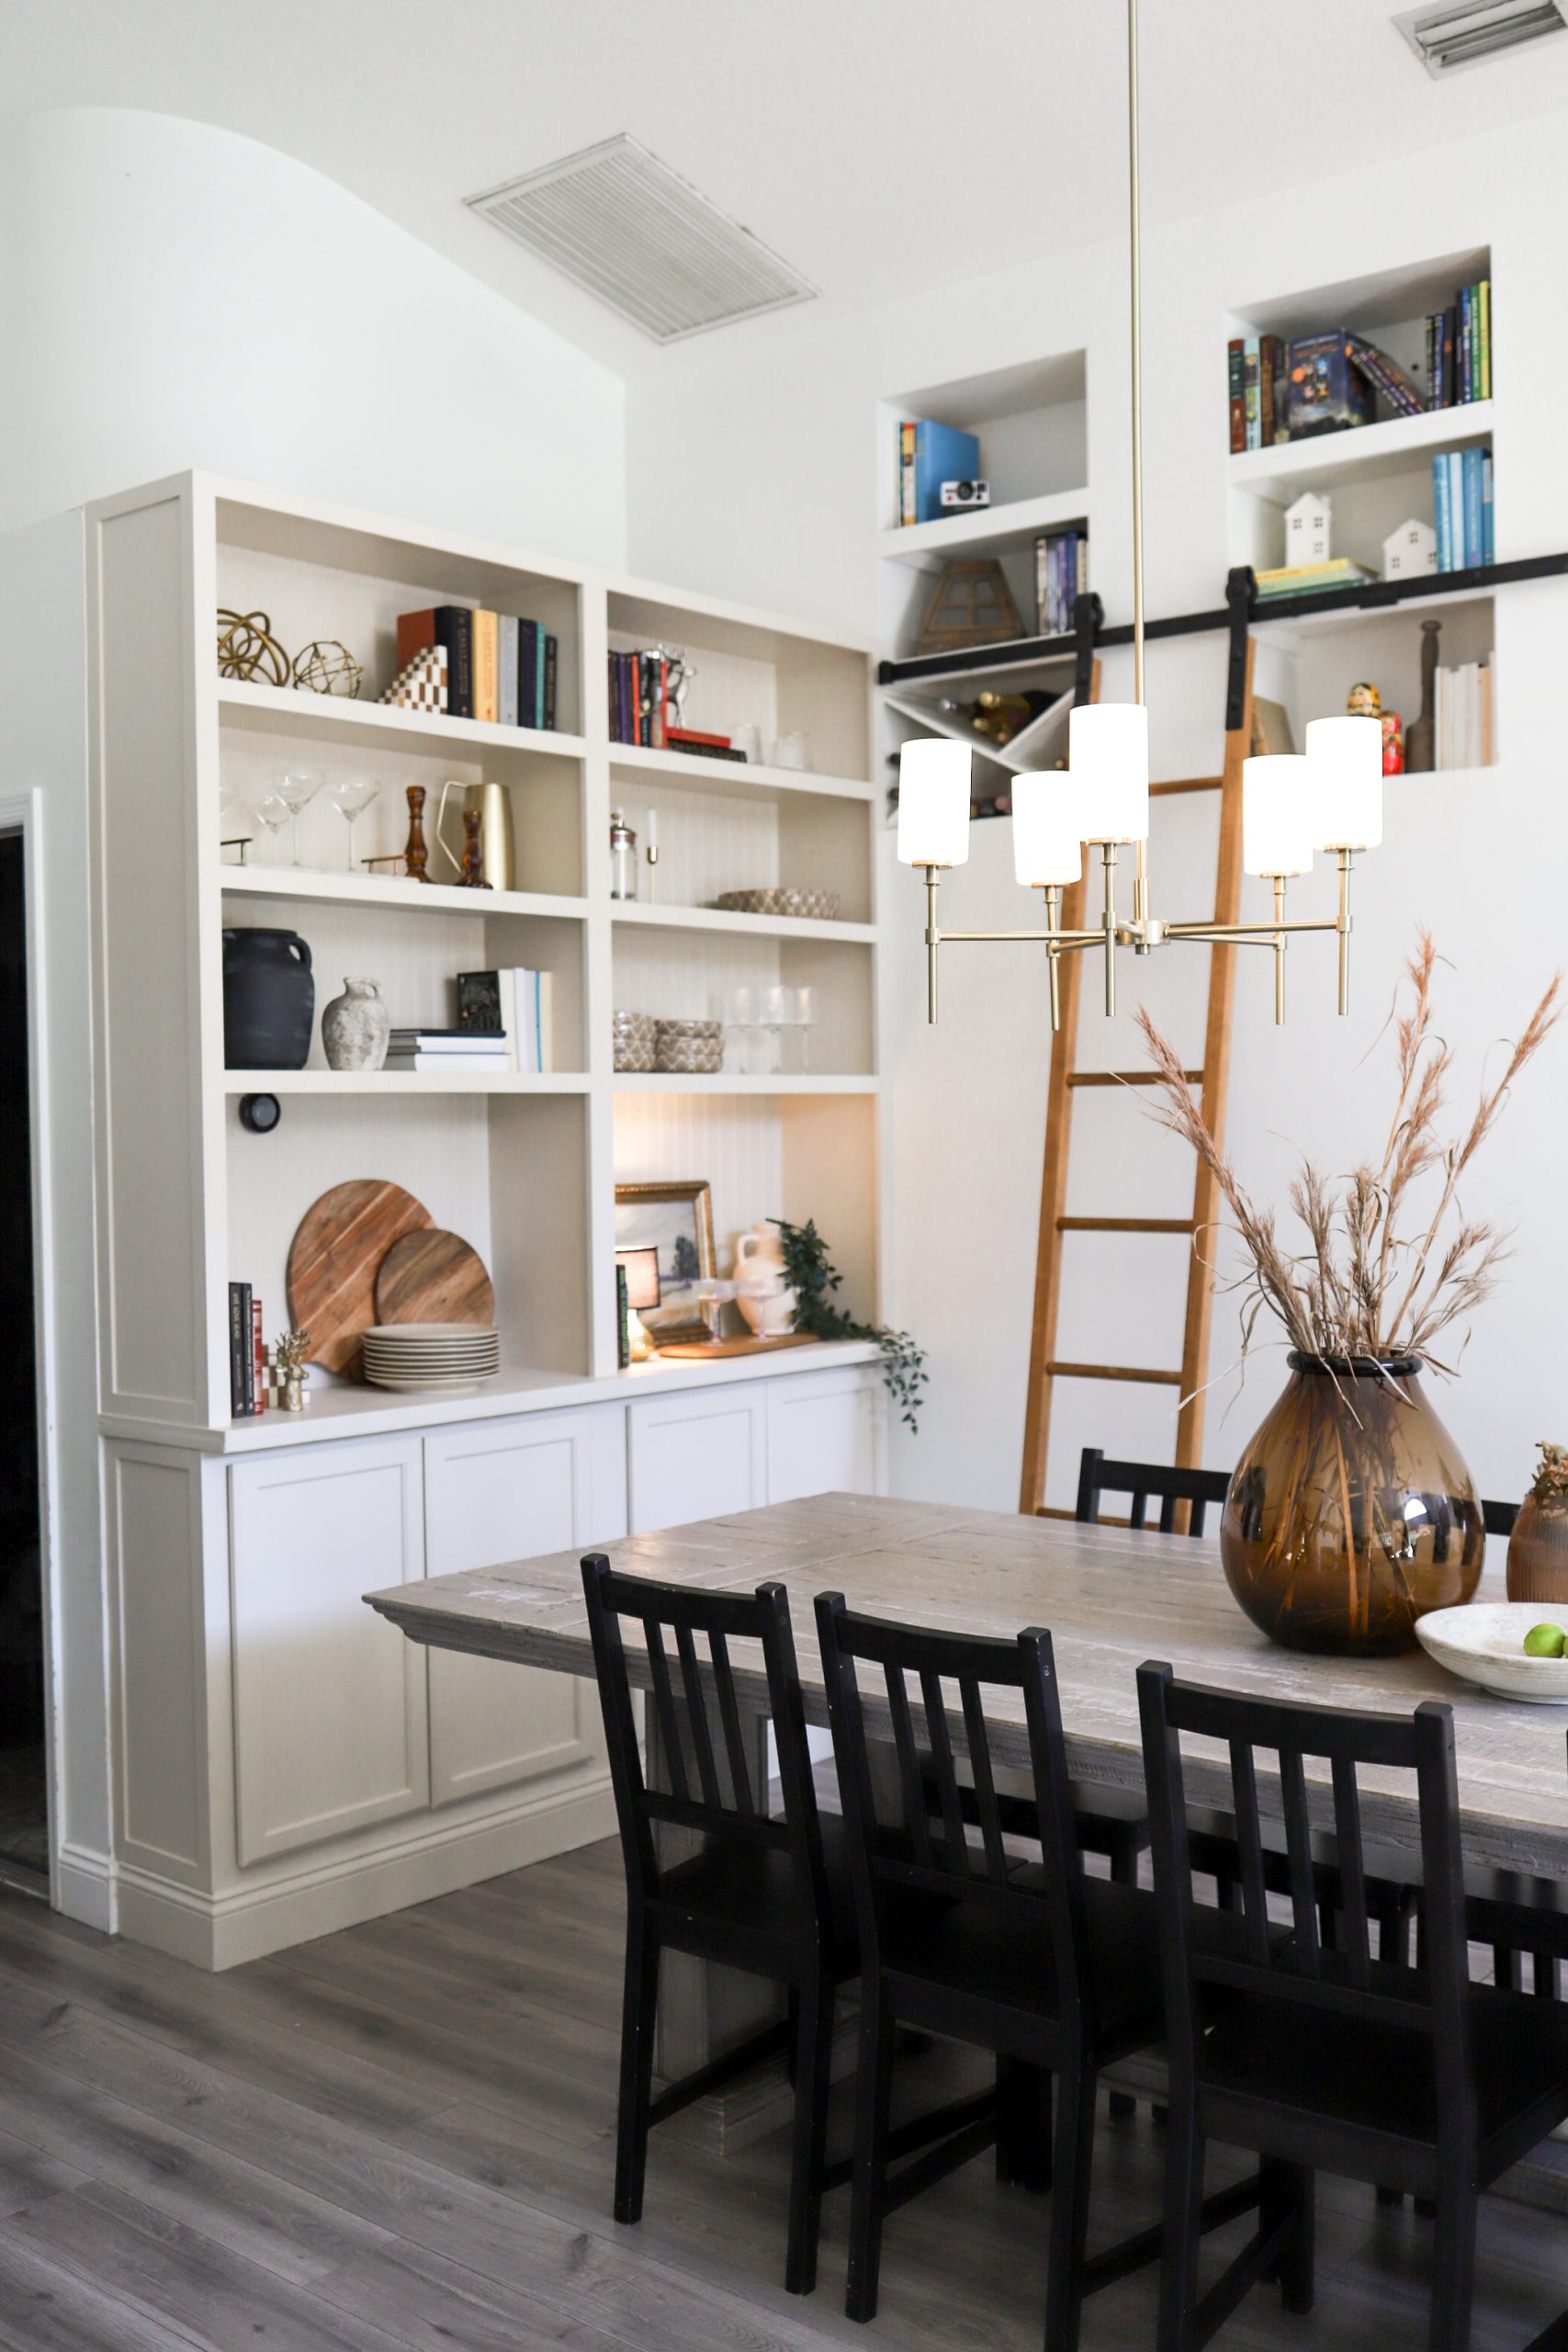
The result? A DIY built-in bookshelf buffet that genuinely looks like it cost a fortune, and didn’t. Here’s every single detail.

Table of Contents
The Vision: Beauty & Function
The original board and batten grid wall was all about aesthetics, and I loved it for that reason. It was a quick, easy and low cost DIY that made a big impact in the space. It you’re looking for a simple project with a dramatic after, you can’t go wrong with that one. But as our family grew into the space (and out of our storage), I realized I needed this wall to do more. Here’s what I was dreaming about:
Our Inspo
- A buffet-style base for hosting, think holiday spreads, drinks stations, everyday serving
- Closed storage below to tuck away the not-so-pretty stuff
- Open bookshelves on top that I could rotate with seasonal décor
- A built-in look that felt architectural and intentional, not like store-bought furniture
Our Hutch
How This Project Came Together
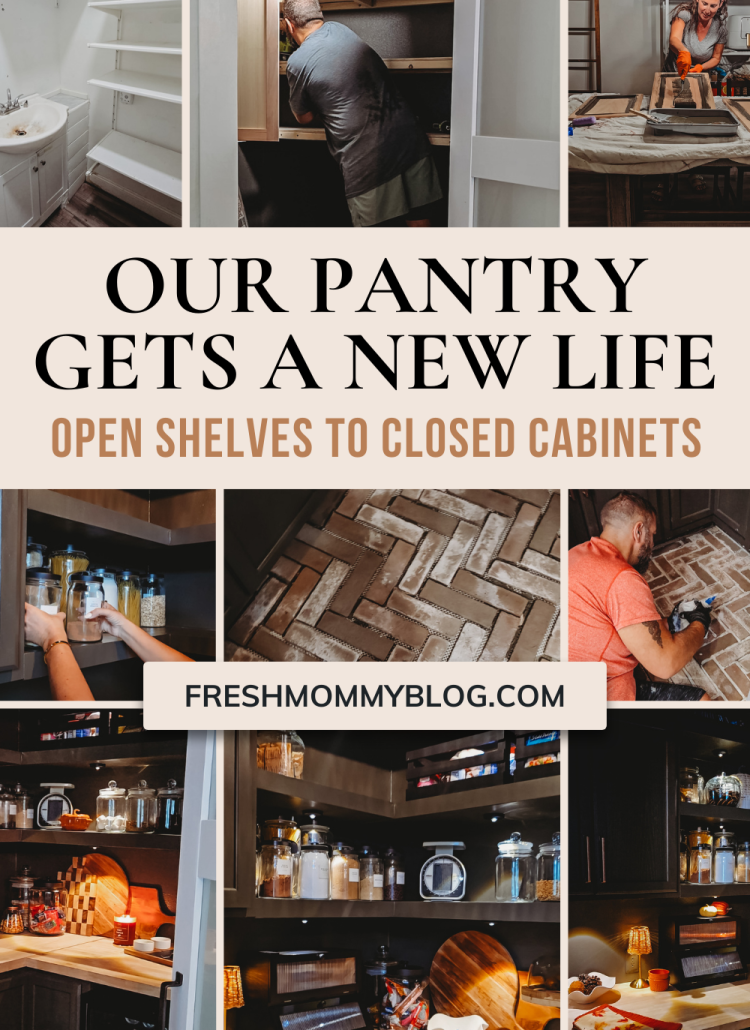
This build was really two ideas colliding at the right time. The first piece of the puzzle came from our pantry renovation, where we had built out lower cabinet units that gave us the closed storage and clean look we loved so much in there. I knew that same approach would be perfect as the base for a buffet, functional, hidden storage with a beautiful surface on top for hosting.
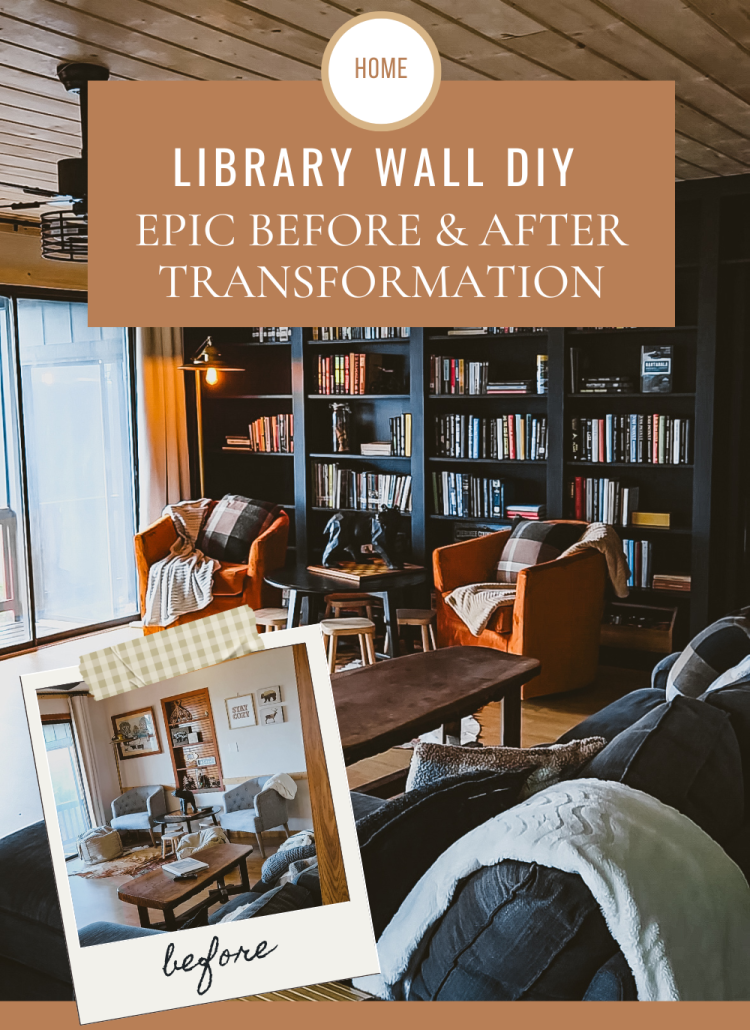
The upper bookshelf portion was where we got to experiment. We wanted that floor-to-ceiling built-in look without the custom carpentry price tag, so we worked through the method here first. After brain storming we ended up building them out of 1/2″ plywood, we are incredibly happy with them, but later realized the IKEA Billy Bookcases could have made a great foundation with a little less work. We ended up applying that approach into our library wall project afterward. So if you’ve seen that post and thought I want that look, this is where it started!
Materials List
- (2) Lower Cabinet – Oak Brook 30-in W x 30-in H x 12-in D Natural Unfinished Oak Wall Fully Assembled Cabinet Flat Panel Square
- Color-Changing 5.5 Ounce(s) Natural Wood Filler
- Primer to paint shelves: Infinity Satin Base C Tintable Interior Paint Paint + Primer ( 1-gallon )
- Paint: Cabinet, Door and Trim Interior/Exterior Bonding Water-based Primer ( 1-gallon )
- PRO Grade Precision Medium 120-Grit Sanding Sponge 1-in x 2.5-in
- Caulking for creases before painting – ALEX Plus 10.1-oz Paint and Trim White Paintable Latex Caulk
- Trim for floor and ceiling: 1in x 4in x 8ft Unfinished #2 Better S4S Whitewood Common Softwood Board
- Finishing Trim: RELIABILT 1in x 4in x 8ft Primed S4S Spruce pine fir Common Softwood Board
- Paint Rollers: WHIZZ 2 -Pack 4in x (foam) Nap Cabinet and Door
- Trim Brush: Clearcut 2 1/2in Reusable Angle Wall Trim Brush
- Edge Banding
- 1/2″ Plywood for Shelves and Counter Top
- Wagner Paint Sprayer
- Bead Board
- Cabinet Base built with 2inx4inx20ft Wood
Shop the Post here:

How We Did It: Step by Step
Step 1: Remove the Original Board and Batten Wall
This was bittersweet, y’all. That grid wall was one of my favorite easy projects! But we said goodbye with gratitude and removed all the furring strips and repainted the wall to give us a clean, fresh surface to build on.
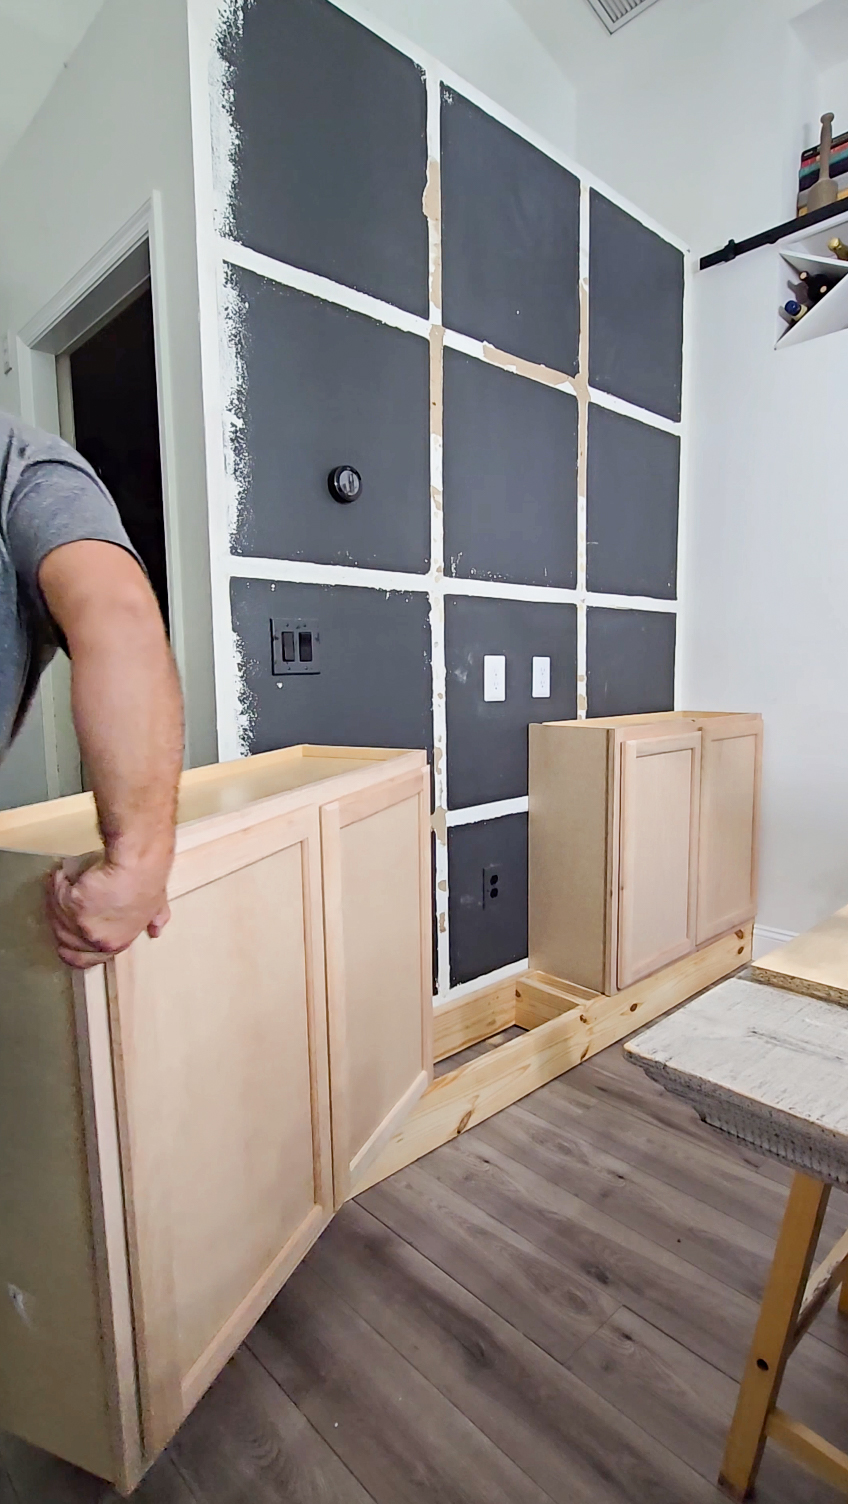
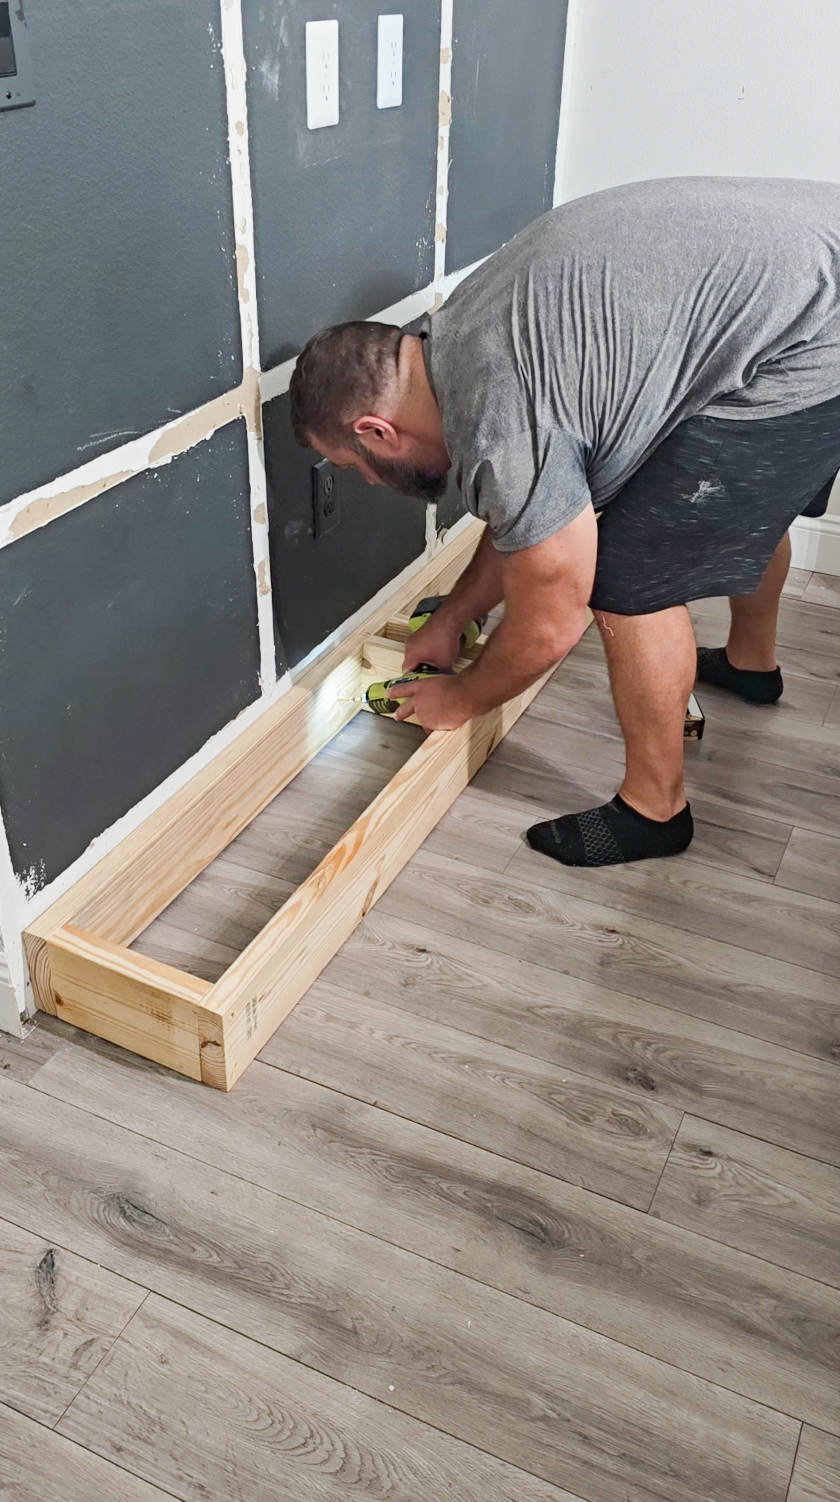
Step 2: Position and Secure the Lower Cabinets
We built a simple base and then brought in the lower cabinet units and arranged them across the wall to map out the width of the buffet. Once we were happy with the layout, we secured them to the wall (always anchor to studs!) and to each other so they’d function as one unified piece. We filled any gaps with caulk for that seamless built-in look.

Step 3: Add a Countertop Surface
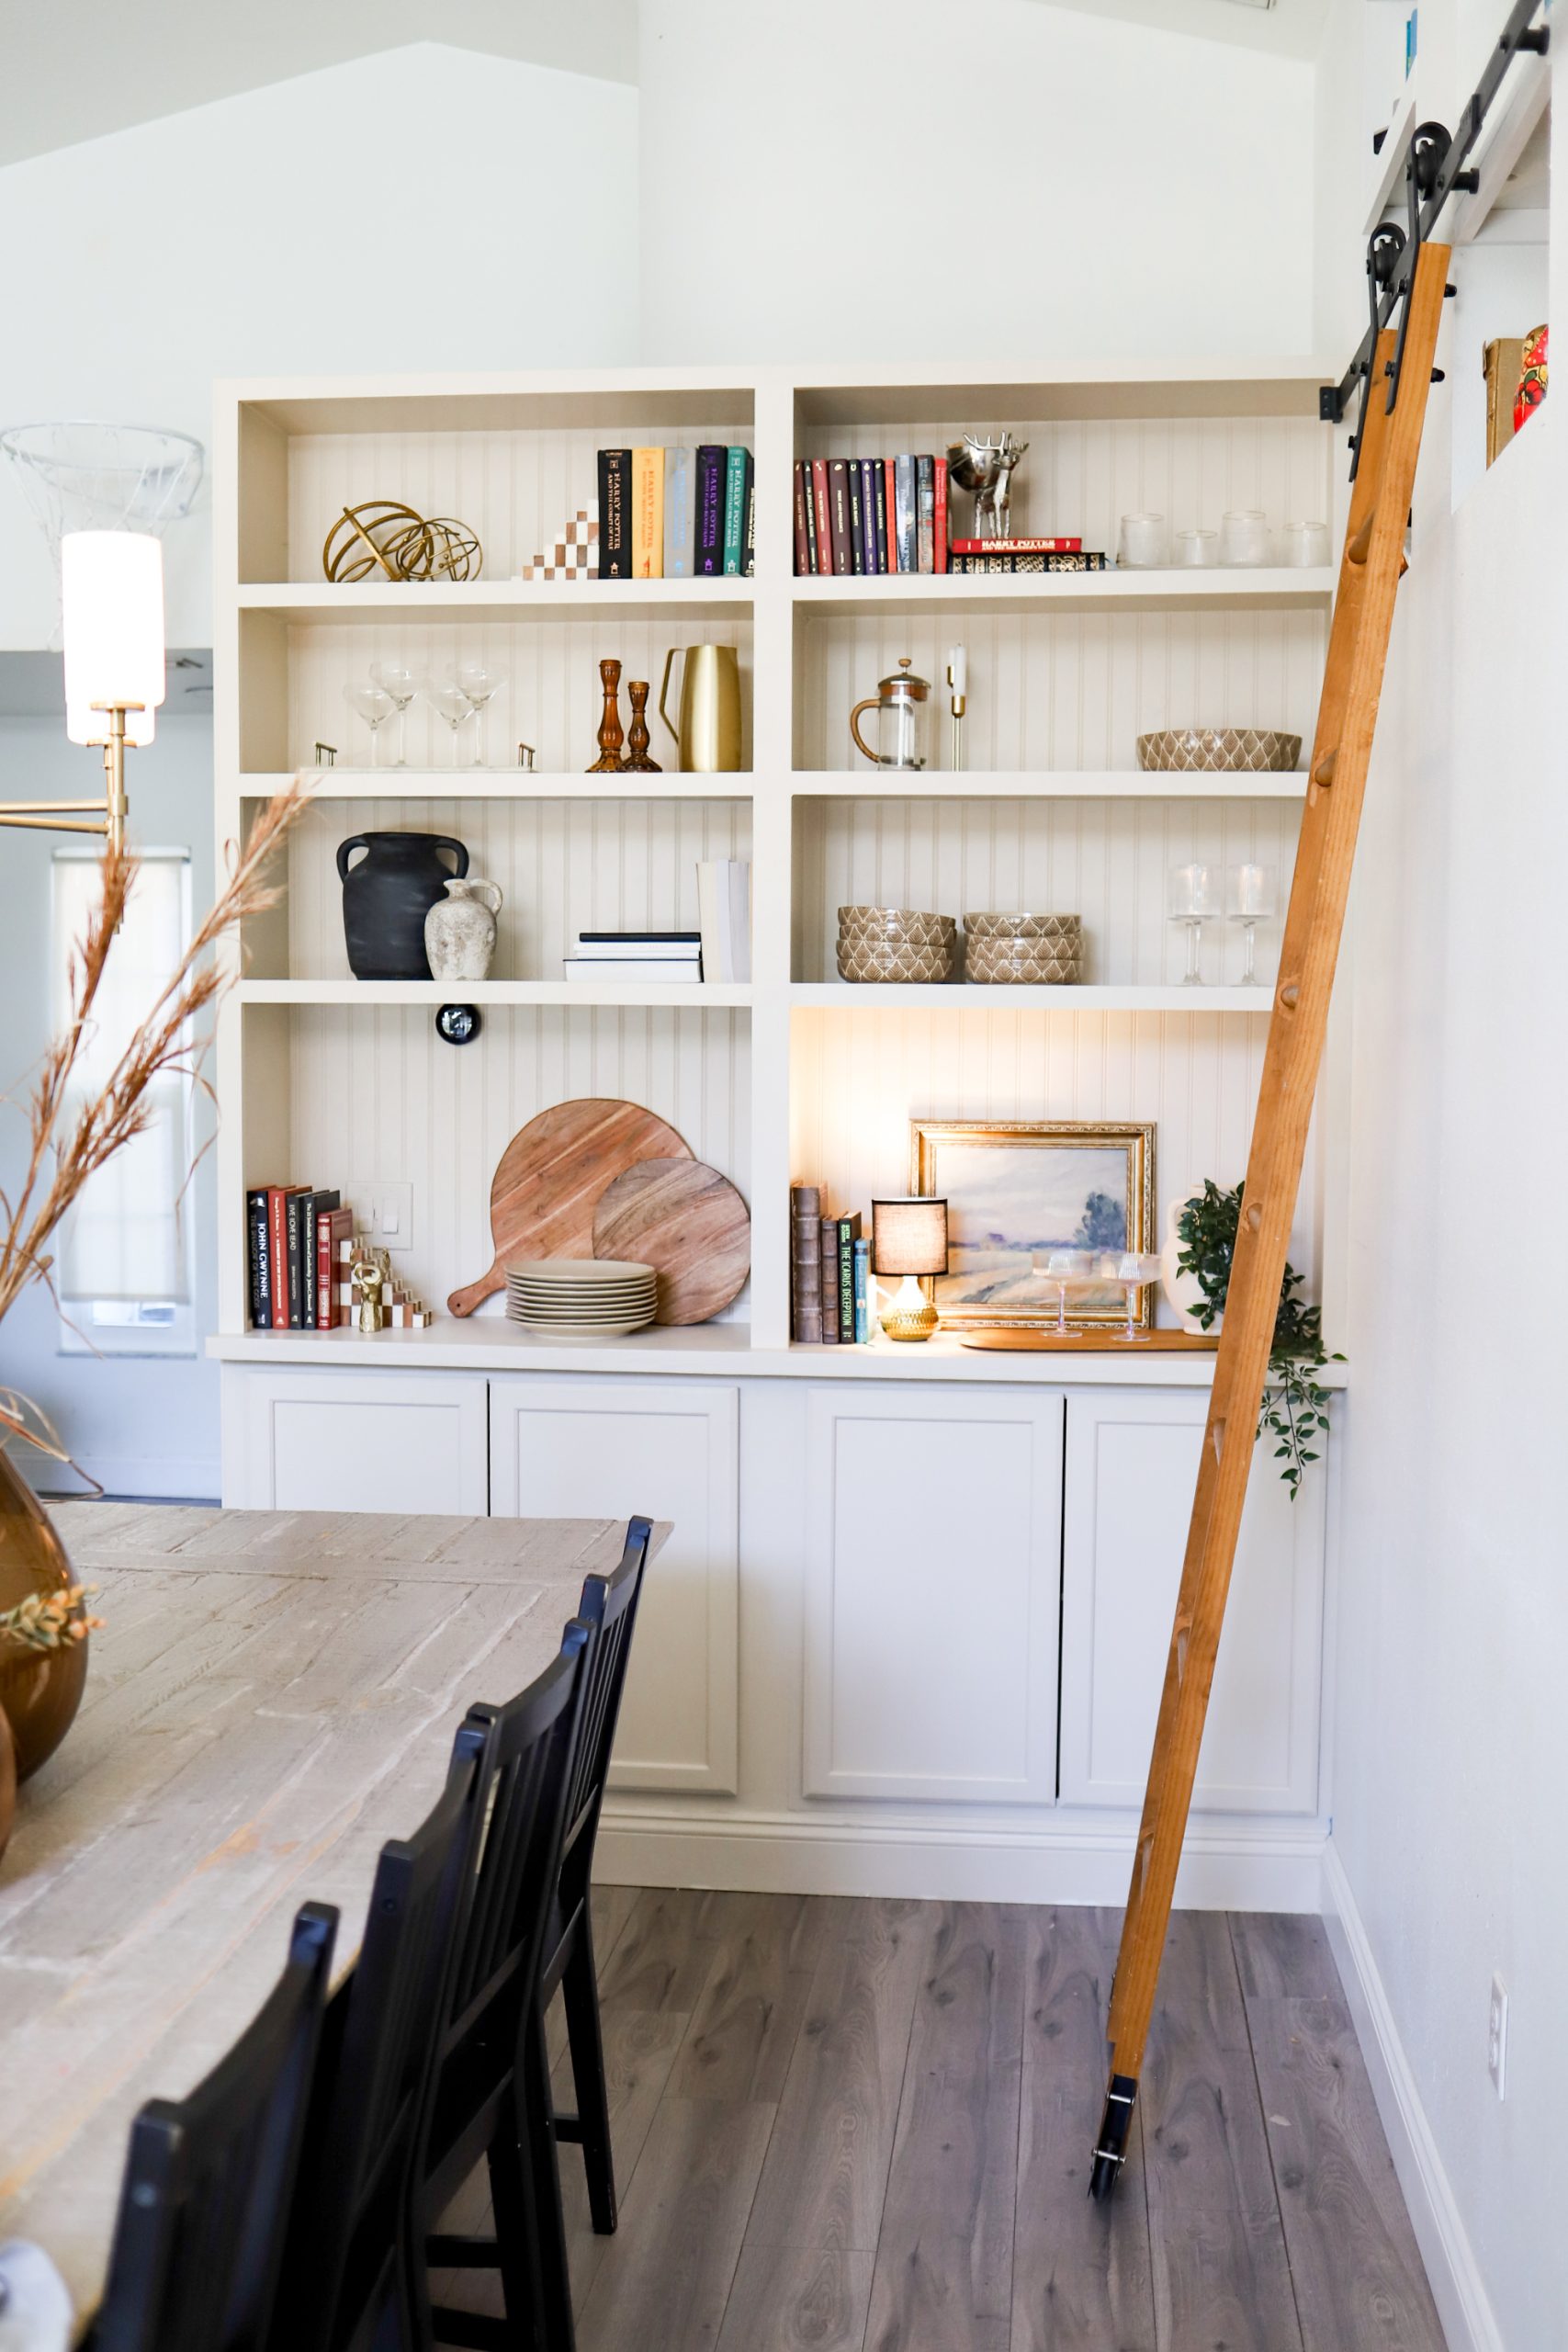
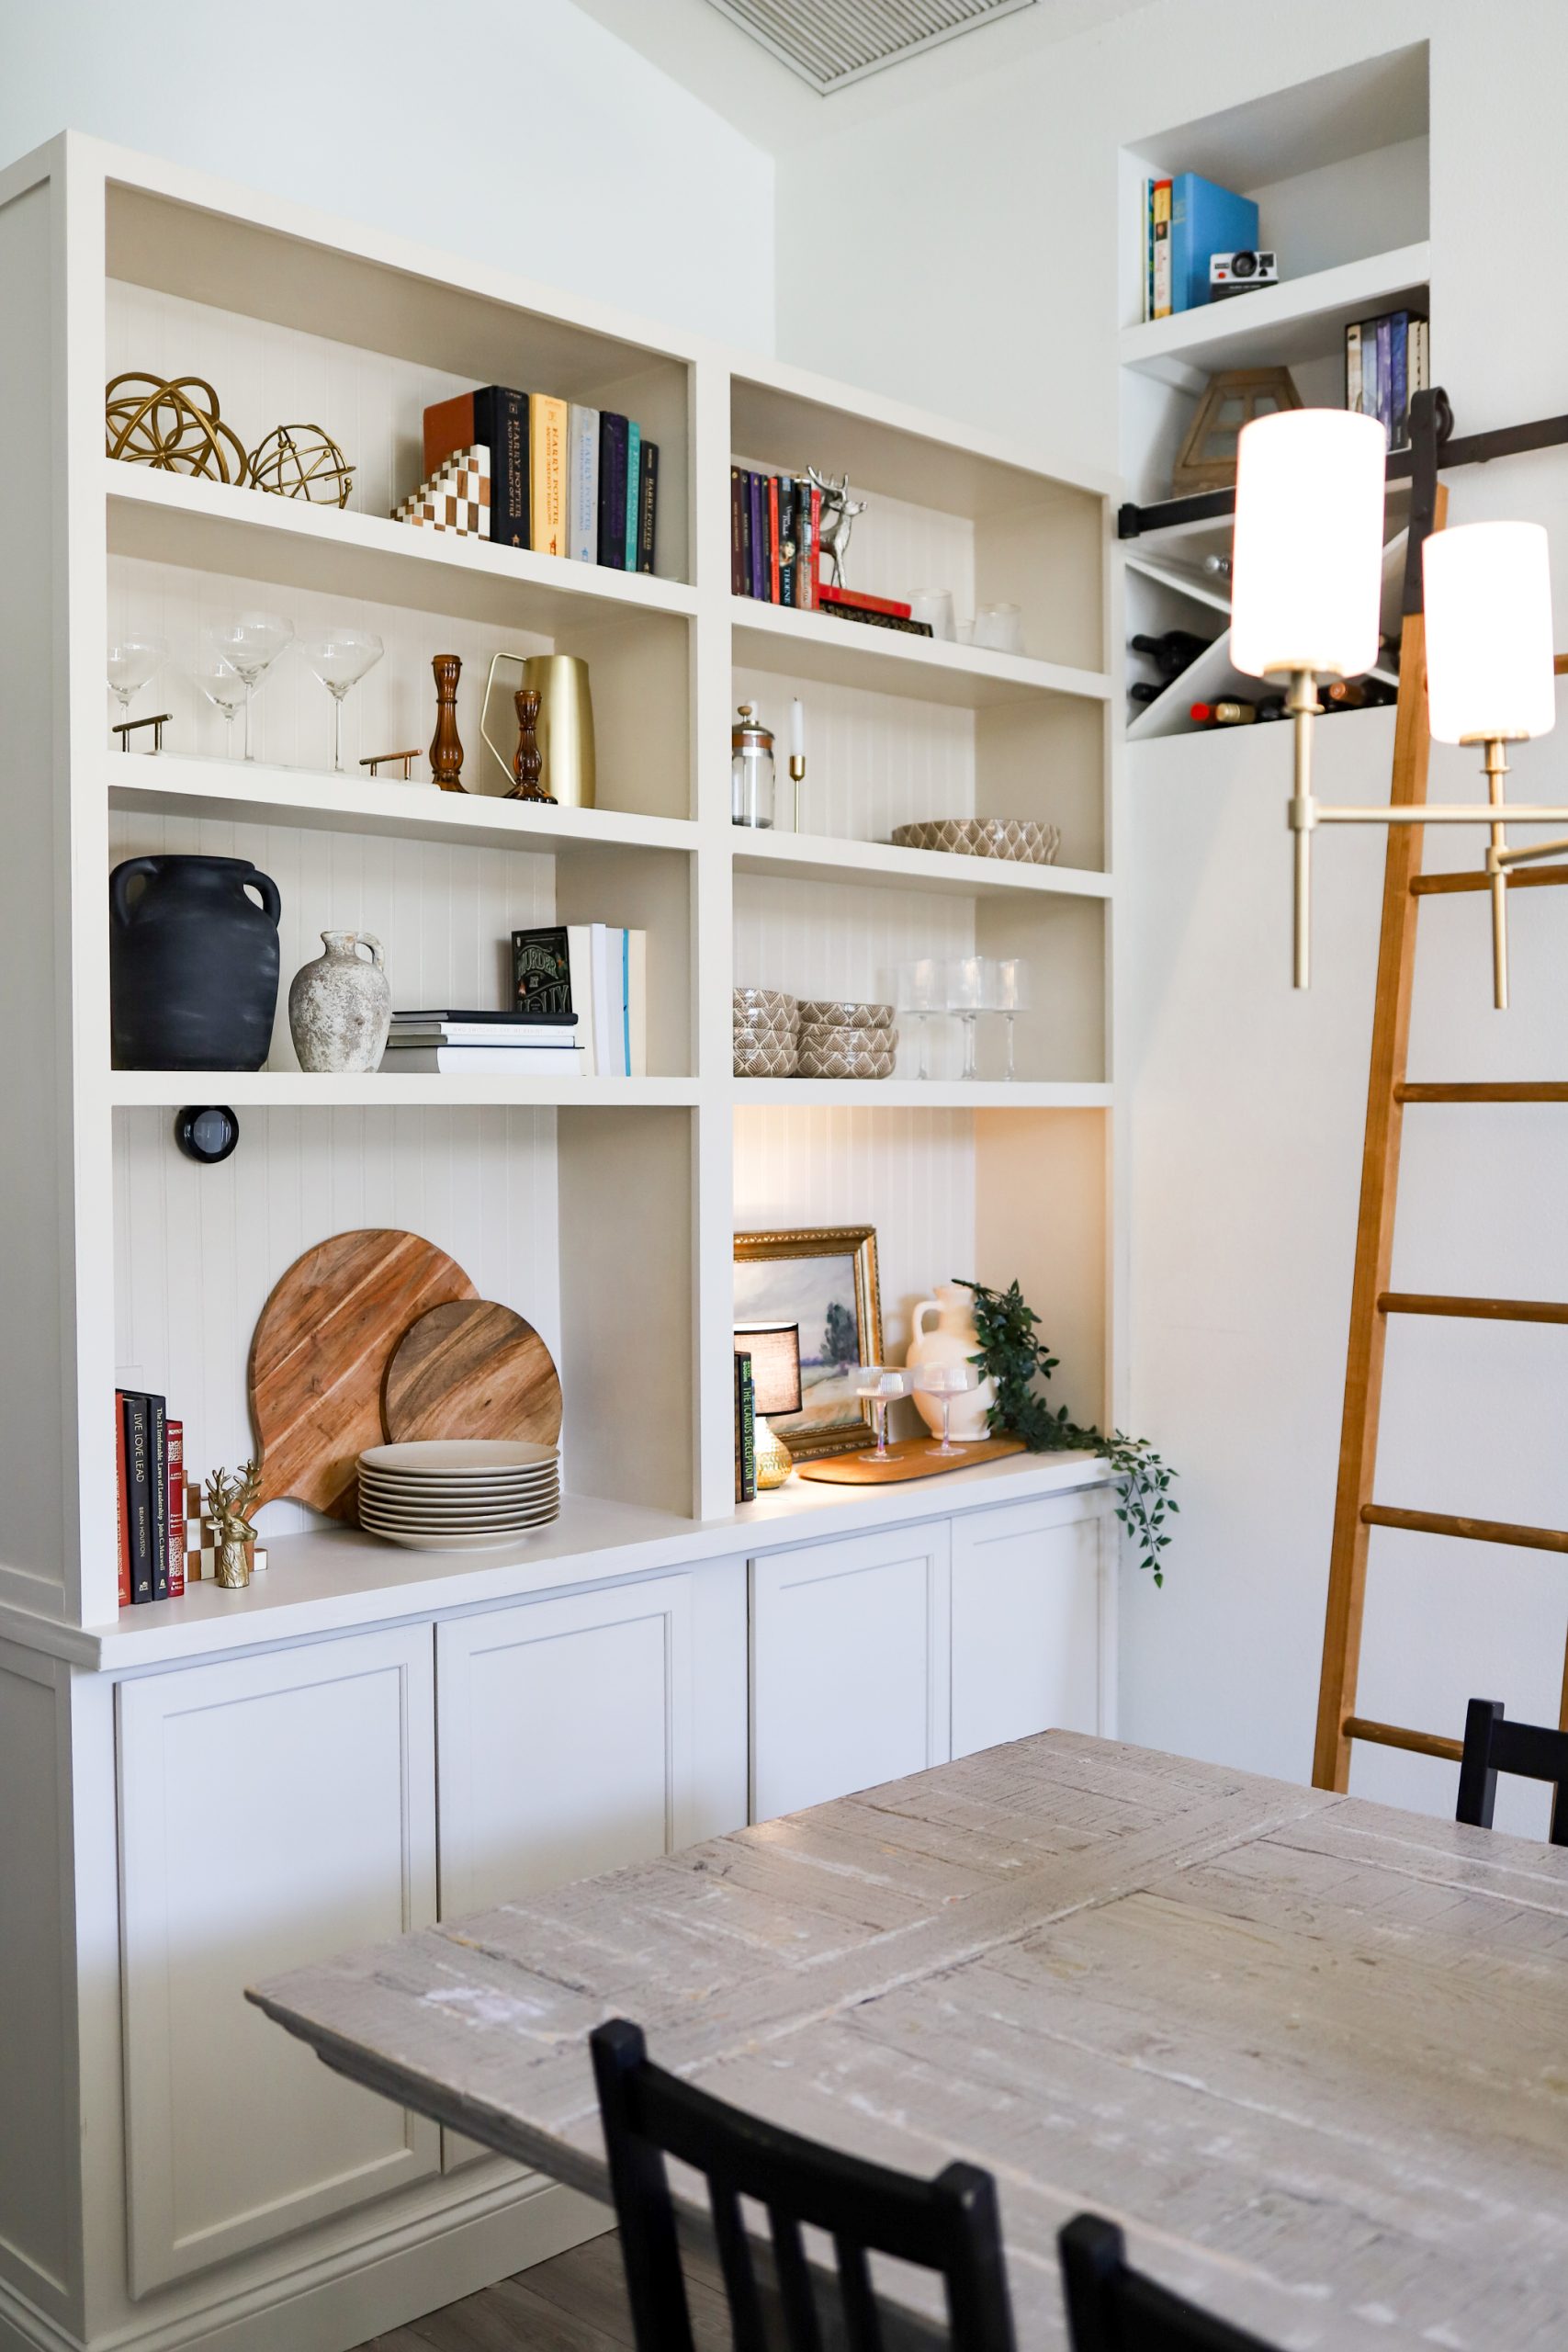
The “buffet” magic happens here. We added a flat top surface across the lower cabinets to create one continuous countertop, the perfect surface for hosting. This is where you’ll set out your holiday spreads, drinks bar, everyday serving needs, you name it. We used plywood cut to size and finished it to match our overall aesthetic.
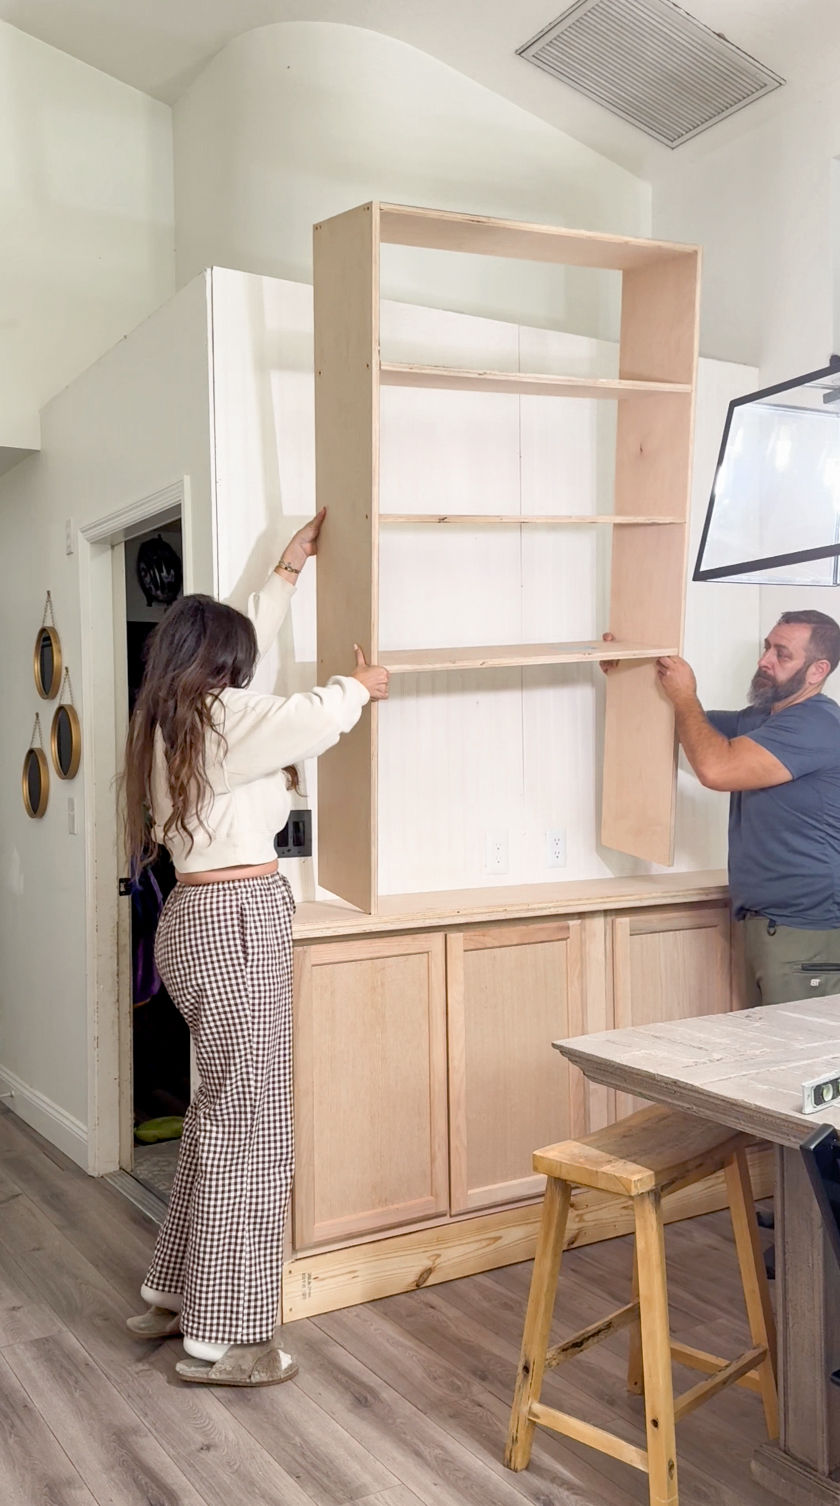
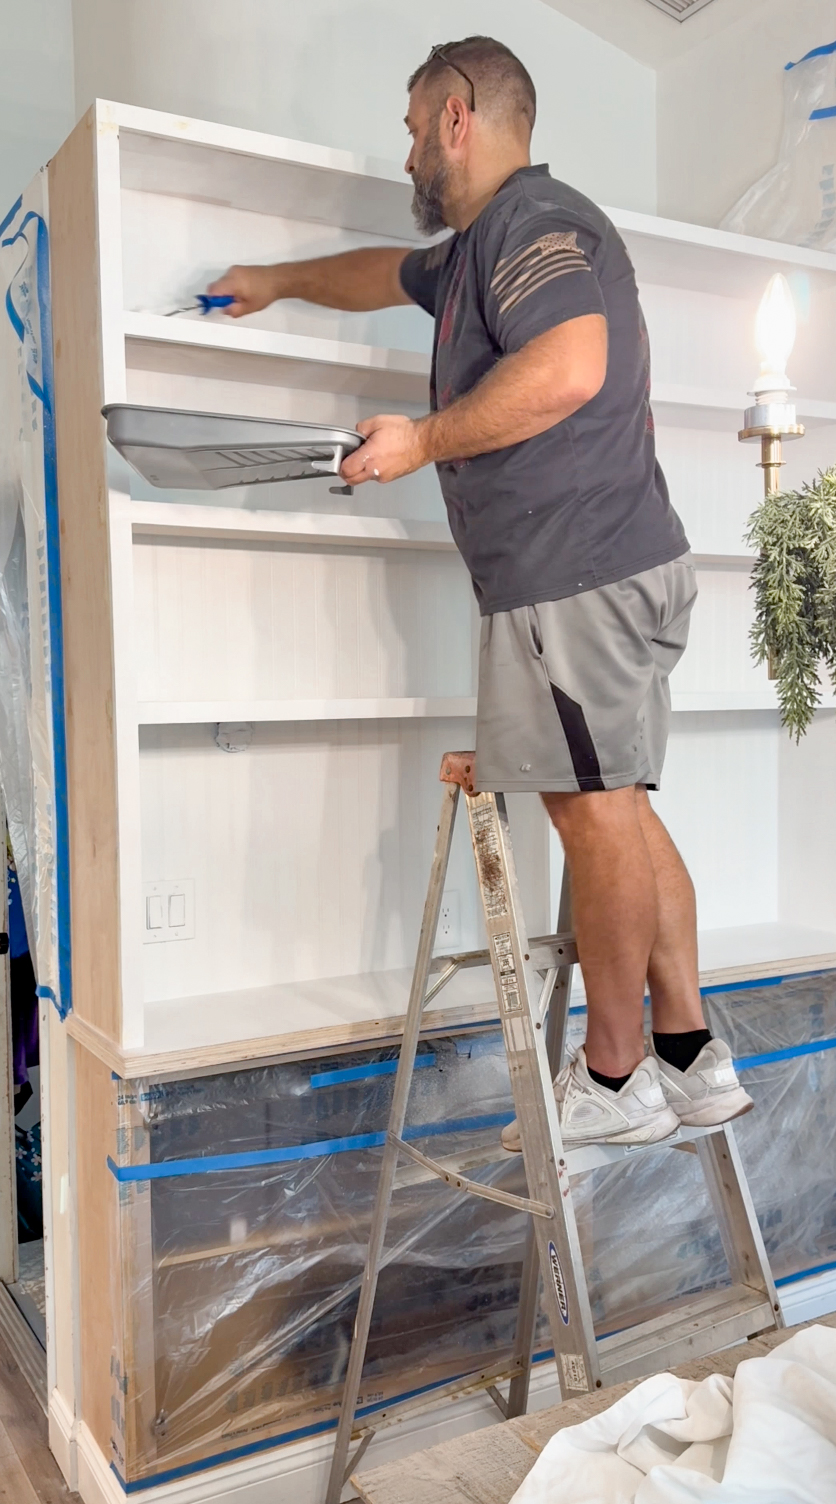
Step 4: Build and Install the Bead Board & Shelves
First we attached Bead Board pieces to the wall so that there would still be some texture on the wall. Then Chris built out the shelves with 1/2″ Plywood. Once the shelves were built we installed them on top of the lower cabinets. Making sure they were secured to the studs in the wall.
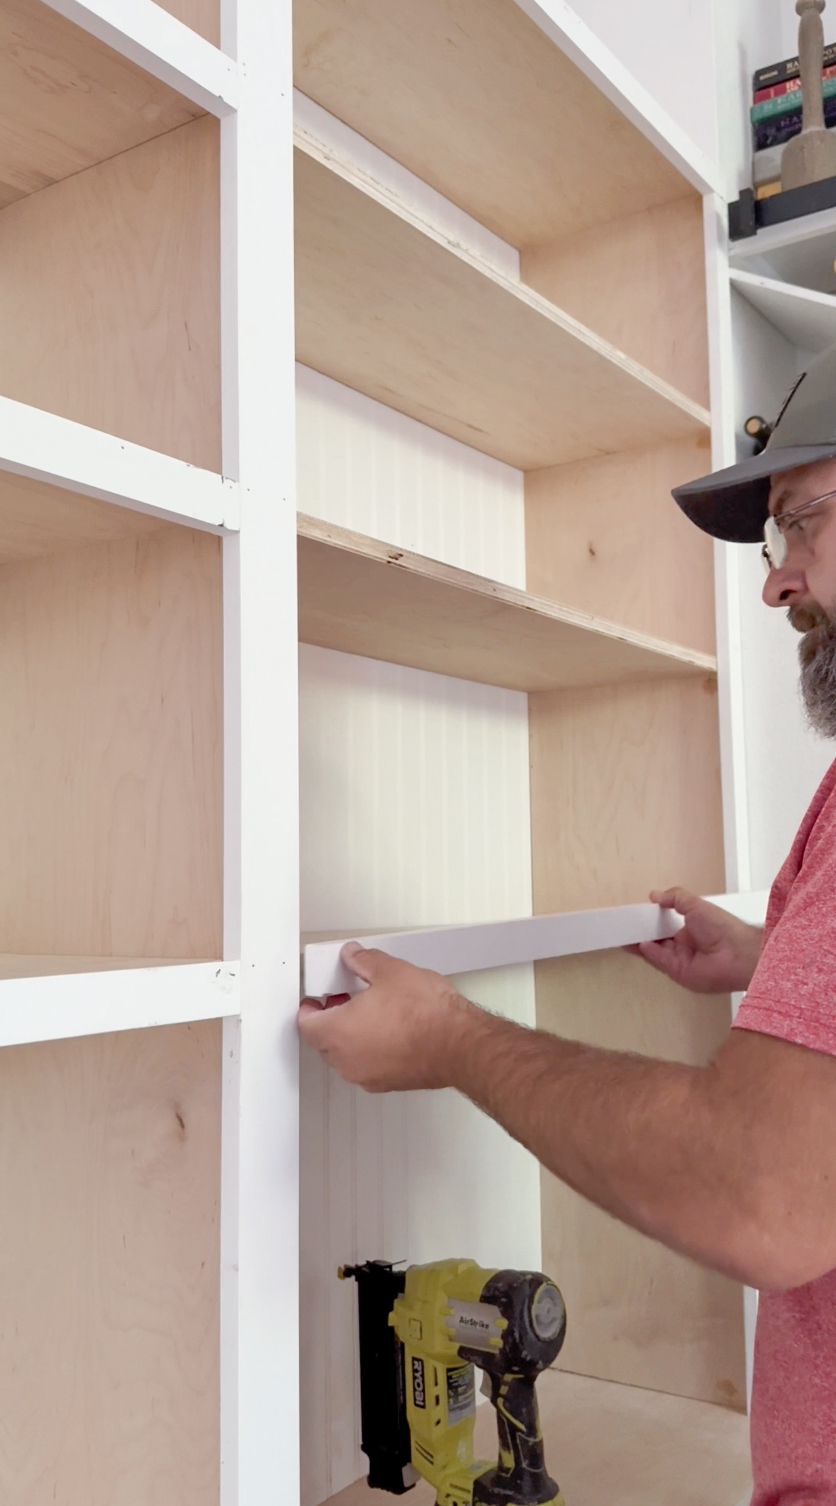
Step 5: Add the Trim Work
The trim work is what makes it look finished and expensive. We ran trim along the top, bottom, and sides, framing the entire unit like one cohesive piece of furniture. We also added trim details to the transition between the upper and lower sections for a finished, layered look.
Take your time with the trim. Measure twice, cut once, and fill every nail hole and seam with caulk before painting. Those finishing details are everything.
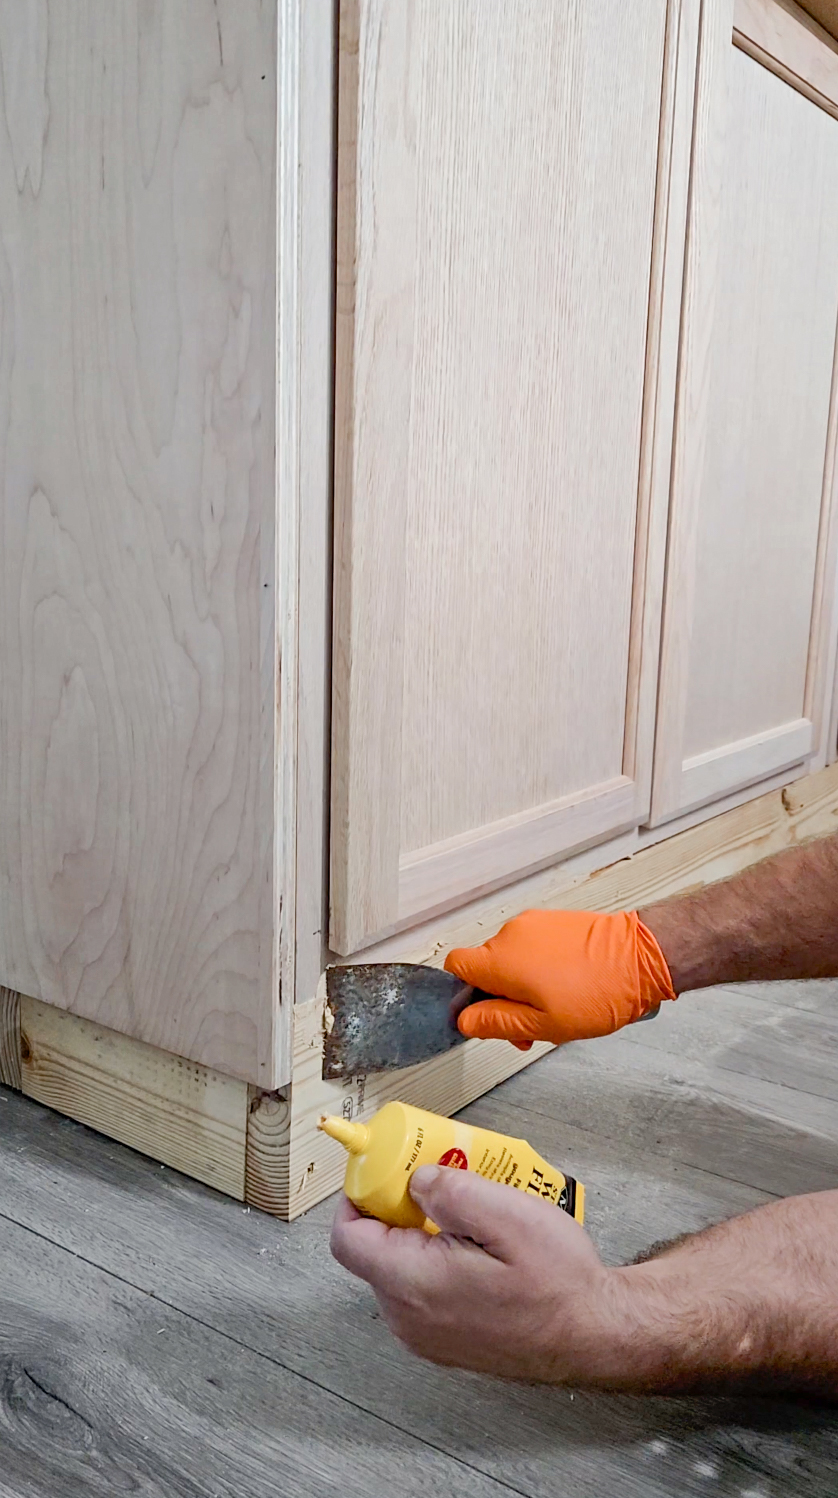
Step 6: Fill, Caulk, and Prime
Before we even picked up a paint sprayer or roller, we filled every single nail hole with wood filler, let it dry, sanded it smooth, and caulked all the seams where trim meets wall or trim meets shelving. This step is tedious but absolutely cannot be skipped if you want a truly polished result.
Step 7: Paint Everything
We painted the entire unit, upper bookshelves, lower cabinets, all the trim, in one cohesive color. A single unified paint color is what truly ties it all together and makes what is actually several different pieces look like one intentional custom built-in. We used a paint sprayer for a smooth look and an angled brush for all the detail work and trim.
The Best Part: It’s Actually Functional
Can we talk about how much we are using this thing? The lower cabinets hold SO much, serving pieces, extra dishes, table linens, all the things I used to shove in random spots around the house. The buffet top has genuinely changed how we host. I can stage it so beautifully for holidays, keep a little coffee and drinks station going, or use it as overflow serving space when we have people over.
And the bookshelves? I’m obsessed with styling them for each season. That flexibility was everything I hoped for.
Quick Styling Tips for Your Built-In Bookshelves
- Vary the heights. Mix tall items, medium items, and small accents so your eye travels across the shelf.
- Group in odd numbers. Threes and fives feel more natural and visually balanced than even groupings.
- Add greenery. Whether real or faux, plants and greenery bring life and texture to any styled shelf.
- Layer in books. Stack them horizontally, stand them vertically, mix them in, they add color, texture, and a sense of lived-in charm.
- Use the top for drama. That high shelf is prime real estate for seasonal garland, a village scene, or tall architectural pieces.
- Light it up. A small accent lamp or some fairy lights tucked in can make a huge difference, especially in the evenings.
Shop Some of our Decor Faves Here:
Or you can click here and shop directly on Amazon.

Final Thoughts
If you’ve been staring at a wall in your home that just isn’t serving you anymore, whether it’s a blank wall, a dated accent wall, or a space that’s beautiful but not functional, I hope this inspires you to think about what it could become. The answer just might be hiding in your past projects!
Have questions about any of the steps? Drop them in the comments, I love hearing from you! And if you try this project, please tag me. There is nothing I love more than seeing your homes come to life.
Related Posts:
- DIY Board and Batten Grid Wall Tutorial
- Our Pantry Gets a Second Life: From Open Shelving to Closed Cabinet Dream Space
- Transform Your Blank Wall Into a Stunning Built-In Library
Home Improvement


An Ikea Bunk Bed Hack: DIY Underbed Storage Drawers With Wheels
Looking for DIY underbed storage drawer ideas? This storage drawer looks built in, is easy to make in an afternoon, and won’t break the bank.

Super Simple Homemade Fire Pit DIY That Anyone Can Do
You won't believe how super simple this homemade fire pit is, and the completed project made a big difference. Easy DIY firepit that anyone can do!


DIY Outdoor Planter Box for Hanging String Lighting
DIY Planter for Hanging String Lighting for under $40! How to build a planter for patio lights, or don't use the pole for lights and just use the planter!


Leave a Reply