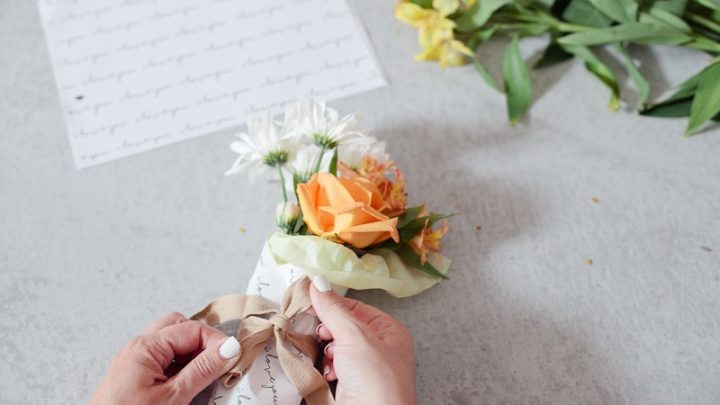
Last weekend, my youngest daughter and I decided to spend the afternoon getting crafty for Valentine’s Day. With a little planning, some delicious drinks and snacks, supplies from Amazon and Michael’s, and a whole lot of pink and red everything, we transformed our dining room table into a Valentine’s workshop.

What I love most about these projects? They’re simple enough that kids can actually help (not just watch), but they turn out looking special enough that you’ll want to keep them out all month long. Plus, we had the best time laughing over glitter spills and debating which shade of pink was “the perfect Valentine’s color.”
If you’re looking for some easy Valentine’s crafts to do with your kids—or honestly, just for yourself because these are adorable—here are the three projects we tackled together.
Table of Contents
Watch our Reel here

DIY #1: Strawberry Rose Ice Cubes
These might be my favorite thing we made! They look so fancy in a glass of sparkling water or lemonade, but they’re surprisingly easy to create.

What You’ll Need:
- Fresh strawberries
- Square ice cube molds
- Water
- A sharp knife

How to Make Them:
- Slice your strawberries – Cut strawberries into thin slices, about ⅛ inch thick. You want them thin enough to be flexible but thick enough to hold their shape.
- Layer them standing up – This is the fun part! Place the strawberry slices into your ice cube molds standing upright, one by one. Layer them so they overlap slightly, creating a rose petal effect. My daughter and I found that starting from the outside and working inward gave us the prettiest “bloom.”
- Add a little water – Slowly add water to the bottom of the molds, trying not to disturb your strawberry arrangement too much. You don’t have to fill it all the way up, I do about a quarter of the way, just enough to hold the strawberries in place.
- Freeze overnight – Pop them in the freezer and let them freeze completely.
- Enjoy! – Add them to sparkling water, lemonade, or even cocktails for the adults. They’re such a sweet surprise in a glass!

Tip: Make these a day or two before you need them. They’re perfect for a Valentine’s Day brunch or a special family dinner.

DIY #2: Ribbon-Wrapped Candlesticks
This is honestly the easiest project ever, but it makes such a beautiful impact! We have brass candlesticks that I love, and adding just a touch of ribbon made them feel festive and romantic for February.

What You’ll Need:
- Candlesticks (we used brass, but any finish works!)
- Thin ribbon in Valentine’s colors (we chose red)
- Scissors

How to Make Them:
- Cut your ribbon – Measure out enough ribbon to wrap around your candlestick and tie in a bow, plus a few extra inches for the tails. We found that 20-40 inches worked perfectly for our candlesticks. We liked the ribbons to drape, but you can modify depending on the height of your candlesticks and preference.
- Tie it on – Wrap the ribbon around the top of the candlestick, just under the platform where the candle sits. Tie it in a simple bow.
- Finish the ends – Here’s the little detail that makes it look polished: fold each ribbon tail in half lengthwise, then cut the end at a slant. This creates that classic “finished” ribbon look and prevents fraying.

Tip: You can swap out the ribbon for different holidays throughout the year! We’re already planning pastel ribbons for Easter.

DIY #3: Hand-Painted Valentine Village Houses
This was our main event! These little wooden houses from Michael’s are blank canvases just waiting to be transformed. We spent a good hour painting, glittering, and decorating ours, and they turned out absolutely adorable.


What You’ll Need:
- Unfinished wooden houses from Michael’s or Amazon (Linked below)
- Acrylic paints in pinks, reds, and whites
- Small paintbrushes
- Decorative mini trees and wreaths (found in the dollhouse section)
- Thin ribbon in red and white
- Glitter in white and pink
- Mod Podge or craft glue
- A plate or palette for mixing paints

How to Make Them:
- Paint your base – We started by painting the houses in our Valentine’s color palette. My daughter chose a darker pink for her cottage, and I went with a soft pink with red accents for mine. Let the base coat dry completely before moving on.
- Add details – This is where you can get creative! We painted doors, windows, and roof details in contrasting colors. Don’t worry about perfection—the charm is in the handmade look.
- Glitter time – While some of the paint was still slightly tacky, we sprinkled pink and white glitter on the roofs and around the edges. Fair warning: glitter gets EVERYWHERE, but it’s worth it!
- Decorate – Once everything was dry, we added our ribbons, mini trees and wreaths using a dot of hot glue. You can tie tiny bows with pink, red, or white ribbon and attach them to the doors and windows.
- Display – We set ours on the mantel with some fairy lights behind them, and they look like a magical little Valentine village!

Tip: Lay down newspaper or a plastic tablecloth before you start. This project can get messy, but that’s half the fun!
Shop the Post


The Best Part? Making Memories
Sure, these DIYs are cute. But what I’ll remember most is my daughter’s excitement when our houses came together, and the way we both had glitter everywhere by the end of the afternoon.
Valentine’s Day doesn’t have to be about expensive gifts or elaborate plans. Sometimes the sweetest moments happen when you’re sitting at the dining room table together, covered in paint, debating whether you need more glitter (the answer, according to my 9-year-old, is always yes).

If you’re looking for a way to celebrate the season with your kids, I hope you’ll try one (or all!) of these projects. They’re simple, they’re fun, and they create something beautiful, both on your mantel and in your heart.
What are your favorite Valentine’s crafts to do with your kids? I’d love to hear what you’re creating this year! Drop a comment below and share your ideas.
Happy crafting, and Happy Valentine’s Day!
xoxo

Valentine's Day


The Best Homemade Playdough Recipe with Essential Oils for Calming
Easy Recipe for The Best Homemade Playdough with Essential Oils for Calming by top Florida lifestyle blogger Tabitha Blue of Fresh Mommy Blog. Change the colors and cookie cutters for any holiday. This pink is perfect for Valentine's Day or Easter!


Leave a Reply